October 10, 2012

So What Wednesday

So What...


So What Wednesday

-If I missed posting "So What Wednesday" for two weeks. Oops. Time flies when you have a baby!

-If I complained and whined about having to go to the dentist this week like a five year old. I HATE the dentist!

-If I've cursed this blasted cold weather 1,000 times already and it's only October. I'm DONE. Done with the cold. *crosses fingers for a residency in the South*

-If I'm so excited for Halloween this year. I can't WAIT to take her to the mall in her elephant costume. And eat her candy. :)

-If I'm trying to make it a point to put on some makeup every day even if I'm not going anywhere. It makes me feel better about staying in yoga bottoms and a tank top all day!

-If I'm ridiculously excited about Fall TV. The Vampire Diaries starts Thursday!

-If I'm already thinking about what dessert to make for Thanksgiving. This and this have already caught my eye.

What are you saying "So What" to this week?

October 5, 2012

Pumpkin Spice Cupcakes with Cream Cheese Frosting

The days are getting shorter. I can see the change happening gradually as the sun begins to set earlier and earlier every day. I'm craving pumpkin donuts and warm cozy blankets and embracing this fall as if it might be our last. Who knows where we'll end up for residency and if it's somewhere down south (finger crossed!) we might not have a fall again.

That's why I'm sharing my first pumpkin/fall recipe with you today. I couldn't wait any longer to break out the pumpkin! As we speak (or you read), there are five cans in my pantry just waiting for their debut.  

We had a birthday celebration recently for one of our friends and the prospect to bake something made me very excited! Oh to bake, to bake again. How I've missed my measuring cups and spoons. I searched through all my recent pins and dog-eared recipes (pinning is much easier than flipping through a magazine these days, who knew) and was overwhelmed with so many choices. Deprivation. I wanted to bake everything!


Then I remembered a day I was waiting in line to pay for groceries, flipping through Taste of Home's recent magazine of fall recipes. I wrote down the name of these cupcakes and suddenly I remembered them- light blub! I knew these would be perfect.


They are so moist and flavorful, practically melting in your mouth as you bite into one. And the frosting- I stuck my finger in the bowl as I was making it and felt my eyes go wide. The balance of spice and sweetness is spot on- delicious! Too bad it's not nutritious. :)

I tried to frost these with my fancy cupcake kit- piping bag and frosting tips, but it turns out baby girl isn't quite ready for me to devote entirely too much time in the kitchen. I had to settle for a plain old butter knife during one of her naps. Not that anyone cared. They were gone in minutes!

Source: Taste of Home
Servings: 2 dozen

3/4 cup butter, softened
2-1/2 cups sugar
3 eggs
1 can (15 ounces) solid-pack pumpkin
2-1/3 cups all-purpose flour
1 tablespoon pumpkin pie spice
1 teaspoon baking powder
1 teaspoon ground cinnamon
3/4 teaspoon salt
1/2 teaspoon baking soda
1/2 teaspoon ground ginger
1 cup buttermilk

Frosting:
1 package (8 ounces) cream cheese, softened
1/2 cup butter, softened
4 cups confectioners' sugar
1 teaspoon vanilla extract
2 teaspoons ground cinnamon
1. In a large bowl, cream butter and sugar until light and fluffy. Add eggs, one at a time, beating well after each addition. Add pumpkin. Combine the flour, pie spice, baking powder, cinnamon, salt, baking soda and ginger; add to the creamed mixture alternately with buttermilk, beating well after each addition.
2. Fill paper-lined muffin cups three-fourths full. Bake at 350° for 20-25 minutes or until a toothpick inserted in the center comes out clean. Cool for 10 minutes before removing from pans to wire racks to cool completely.
3. For frosting, in a large bowl, beat cream cheese and butter until fluffy. Add the confectioners’ sugar, vanilla and cinnamon; beat until smooth. Frost cupcakes. Refrigerate leftovers.

September 20, 2012

Happy 2 Months!

Our precious baby girl is two months old! So much has changed over the past two months I can hardly believe it. She really is a different baby- wide-eyed, alert, talkative, and happy. We get huge smiles from her every morning on the changing table and lots of "ooo's" and "ahhh's" as the day goes on. I can almost see her mind working as she takes in the world around her, lifting her head off my chest to look back and forth. She still enjoys car rides, walks in her stroller, and now likes to hang out on a blanket on the floor, all by herself. I'm pretty sure she has a conversation with her mobile every day too, as she is the most "talkative" lying on her back looking up at the monkey, elephant, and zebra above.


I know I said it already, but I really can't believe two months have passed. On one hand it feels like it's been longer, like she's been here forever. On the other it feels like time has passed so quickly I never even knew it was September until recently. How is this month almost over? I have no idea. Time, days, weeks, months...none of it matters to me anymore. The days blend together and start anew with me wondering what new thing baby will discover next.


I can finally say that I get it- it does "get better." Those first 7 weeks were some of the hardest of my life. Sleep deprivation, exhaustion, emotions, the battle I had with myself daily to just.let.things.go. The laundry, the dishes, the clutter! If you know me you know I like to keep a clean house and it was actually really hard for me just to submit to the disarray. But I did and I feel so much better about it now. Dishes in the sink from last night's dinner? Oh well. A pile of laundry waiting to be folded on top of the washer? I'll get to it. Eventually! Going to bed as soon as the baby falls asleep? Necessary.


I love you my sweet girl. You've made me one happy Mommy.

September 19, 2012

So What Wednesday

This week I'm starting something new- So What Wednesday.

I'm not sure what direction this blog is going to take. Primarily it will still be a food blog- whatever and whenever I cook something new, improved, exciting, delicious, etc in the kitchen, I will share it with you. But I'm starting to view my blog as more than just a place to share food. I have a lot to reflect on nowadays, you know?

I decided to start with participating in "So What Wednesday" because I see it as a reflection piece; "so what" if I think or do certain things nowadays. My life is different- for the better, for the best, and I have to share, in whatever aspects and in whatever form that may be. 

So What Wednesday

So What....

-If I'm super excited for the iPhone 4s. Nope, not the iPhone 5. I've had the iPhone 3 for a while and now I'm getting the next one up! I guess I'm behind the times.

-If all my instagram pictures are of baby....and occasional some food.
 Follow me! @ thiswomancooks.


-If I'm so in love with Parenthood. I cry every.single.time I watch that show. I never want it to end.

-If I allow baby girl to nap on my chest sometimes. It's the sweetest/best thing in the world.

-If I'm ridiculously excited to hear back from hubby's residency programs. I'm not the one becoming a doctor!

-If I've checked out every book in the library on how to get your baby to sleep. I can't wait for her to start giving me a 4 or 5 hour stretch...she's still doing three hours!

-If a little part of me secretly wishes I was still pregnant so I could eat chocolate, cake, brownies, etc without feeling bad. :)

-If I'm dreading the colder temperatures. It was 39 degrees overnight- it's September!!


September 6, 2012

White Chocolate Blueberry Cookies

The past two weeks have been hard. Hubby's schedule has been all over the place with a rotation in emergency medicine. I can't imagine how single parents, military wives, wives of pilots, surgeons, do this on their own, daily. At least my hubby comes home every day (even if it's not always at the same time...) and I can get a minute to myself- usually a quick shower or a run to the grocery store.

Babies are a lot of work! Really, I'm just waiting for the day that I get a 4 or 5 hour stretch of sleep at night. That's all I need baby. Sleep!

Somehow in the midst of it all, I managed to make these cookies. It was several weeks ago when hubby was off for three days in a row (yay!) and I said, that's it, I need to BAKE SOMETHING!


It had been too long.

These cookies are so moist. They're chewy and have the perfect balance of buttery sweetness. The blueberries are not overpowering and the white chocolate is a welcome combination. I think they're the perfect cookie to eat your way through the end of summer before blueberry prices sky rocket again.


It was really hard not to eat these cookies in one sitting. Thankfully, they do hold up well, I'd say almost a week later and they were still pretty darn delicious. Telling myself that I gotta lose the rest of this baby weight was the only thing that kept me from reaching for another!

August 22, 2012

Creamy Pasta with Italian Turkey Sausage

Today I have the task of keeping the house quiet. As quiet as possible as I can with a 5 week old and dog that likes to bark at any given noise she hears outside our front door. She is a handful- no, not the baby- my dog.

Is this practice, training for when I have a toddler and a baby? I swear sometimes I already feel like I have both! Sandy (the dog) is definitely a jealous, attention hogging pup. Whenever I'm on the floor playing with baby, here she comes whacking me with one of her slobbered up toys and jumping on my back. Then she proceeds to take out ALL of her toys, run around the house like a maniac, and dump her food all over the floor. Too bad I can't tell her to pick up after herself!

Anywho. Today. Hubby is sleeping after working a night shift in the emergency room. I'm doing my best at keeping baby and dog entertained and let me tell you, it's actually harder keeping the dog quiet than the baby! So how am I managing to write this post right now, you say? Well, currently dog is hiding under the couch after I threatened her life after barking at the UPS truck, and baby is strapped to my chest in her carrier. She passes out every time.


Now let's talk about the food, shall we! I made this...oh, who knows, weeks before baby girl was born and I've made it a couple times since (not lately, mind you...). It's pretty good, a decent get-yourself-through-the-work-week meal. It's got protein from the turkey sausage, veggies to make yourself feel good about eating a huge bowl of pasta, and a creamy sauce.

Wish me luck! I've got three more hours to go!

Source: adapted from Mrs. Schwartz's Kitchen 

1 package turkey Italian sausage
1/2 onion, finely chopped
4 cloves garlic, finely minced
1/2 red pepper, chopped
2 cups cream or half and half
1 1/2 cups (or so) parmesan cheese + additional for garnish
1 lb penne pasta (or variety of your choice)
1 cup frozen peas
Parsley for garnish (optional)

Heat a large skillet on the stove on medium. Remove the casings off the sausages and add to the skillet. Brown the sausage and grab your pasta pot to begin boiling the water. Once the sausage is fully cooked, remove from the pan and place on a paper towel lined plate.

Add the onion to the pan and cook for about 3 minutes.  After 3 minutes, add the garlic.  Cook for an additional 2 minutes. Add the red pepper to the pan and cook for about a minute. Make sure you already have the pasta boiling!

Add the cream to the skillet and bring to a slight bubble on medium heat. Be careful not to let it boil. Add the cheese once it comes to a bubble. Stir and bring back to a slight bubble and let it thicken.

Drain the pasta and add it along with the sausage and peas to the pan.  Toss to coat in the sauce.

August 17, 2012

Baby Update: One Month Old!


I can't believe a month has gone by since my baby girl came into this world. It almost feels like I was never pregnant and that she has been here all along. Despite not sleeping, feeling like a walking zombie at times, exclusively nursing every hour to an hour and a half, I absolutely love my new job as a stay at home Mom.

Baby girl and I have just started to get to know each other. She hates her bassinet and prefers to sleep in her Rock N' Play or in Mommy's or Daddy's arms. She loves to play in her crib and can spend a good half hour staring at her toys or listening to music. She also loves walks in her stroller and to take naps in her car-seat. I just pulled out the carrier too and am able to walk around the house with her completely content.


Recently she has been able to swat at the toys dangling from her play gym. She is getting really good at keeping her head up and will look all around the room.

I can't wait for her to start smiling, cooing, ahhing, and recognizing our faces. She is already growing like a weed and will soon no longer be able to wear her newborn outfits. I can't wait to find out how much she weighs at her next appointment! 


Slowly but surely I will begin cooking again. The crock pot and easy meals that I can throw into the oven have been lifesavers. This blog will not turn into all things baby- it will remain a place for me to share my love of cooking and baking. But you'd better believe that there will be lots of pictures, stories, and updates about our baby girl!


July 30, 2012

I'm a Mom!

I'm happy to introduce you to the newest addition to the This Woman Cooks! household; our baby girl was born two weeks ago, weighing 5 lbs and 12 oz.


The process started at 3:00am with strong contractions, coming every 3 to 4 minutes. I knew she was on her way! By 6:30am we were in the car headed to the hospital. After being checked in, given a room, and an epidural, the doctor said I was just about ready to push! She was not wasting any time.


Luckily, my labor was uncomplicated and an easy ride (at least, compared to what I thought it was going to be). I couldn't have asked for a better experience. When she was placed on my chest, the hubby and I both burst into tears, amazed at the life we had created together. Two weeks later and we are even more amazed at how she has changed in such little time. We are in love, in heaven, obsessed with our little girl.


I hope to return to blogging soon, once I get the hang of prepping and cooking with this little one around. :)


July 5, 2012

S'more Chocolate Bars

Yesterday we had one last hoorah before our baby decides to make her debut. We celebrated the 4th in style grilling out back in our patio with good friends and good food.

On the menu: mustard and herb marinated chicken, grilled steak, roasted potato wedges with red ranch dressing, slices of Italian bread with tomatoes and mozzarella cheese, garden salad, corn on the cob, S'more chocolate bars, and lemon blueberry muffins.   

I prepped all the food in the morning, starting with slices of Italian bread, tomatoes, and mozzarella cheese. I also made the S'more chocolate bars and did a little sampling. Delicioso! 


I also got a little crafty. I took out my Cricut and made some stars. I found an old blue ribbon, glued the stars on, and hung it on our door. It came out great, if I do say so myself. I was very proud.


We arranged all the food out back and grilled chicken, steak, and corn. Later on in the evening we cheered watching a "show" of fireworks, hosted by the hubby.


_____________________________________________________________________

 Now, what can I say about these S'more bars? They were a hit! Gooey, chocolatey, with a yummy brownie layer, I knew I was going to make them for the 4th as soon as I saw them in one of my cookbooks. As our friends arrived they started to eat them, before we even had anything set out on the grill!


Source: adapted from Celebrating Cookies Book 2 
Servings: about 4 dozen bars

1 box of brownie mix
vegetable oil
water
egg
14 graham cracker sheets, crumbled
2 cups semisweet chocolate chips
3 cups marshmallows


Preheat oven to 350. In a large mixing bowl, combine the brownie mix and the oil, water, and egg (follow directions according to your mix for measurements). Stir until well combined. Pour into a greased 9 x 13 pan. Crumble the graham cracker sheets over the mix, giving it a shake before it goes into the oven to evenly spread out the crumbs. Bake for 20 minutes.

After 20 minutes, take out the brownies and top with the chocolate chips and marshmallows. Place back into the oven and bake for 10 more minutes or until marshmallows begin to brown. Cool in pan on a wire rack.

When the bars have cooled,  oil a knife and cut into bars.


July 3, 2012

Chunky Chocolate Cookies

These are the best cookies I've ever made. Ever.

They are rich without being overly rich. Sweet without being overly sweet. Chocolatey without being overly chocolatey. The perfect chocolate chip to cookie ratio. If cookies are served in heaven, these would be it.

I could gush on and on about these cookies for hours. We couldn't get enough of them. I must have scarfed four in a row after having my first one. The hubby too, proclaiming them "the best cookies I've ever had."


I don't think you should rule these out to be solely a cookie for chocolate lovers. Sure, they will definitely satisfy any chocolate lovers craving, but if there is someone out there that you know doesn't like chocolate (how is that possible?), make these for them and see if they can resist.


Source: Celebrating Cookies
Servings: about 4 1/2 dozen

1 cup butter or margarine, softened
3/4 cup firmly packed brown sugar
1/2 cup granulated sugar
1 egg
1 teaspoon vanilla extract
1 3/4 cups all purpose flour
1/4 cup cocoa
1/2 teaspoon baking powder
1/2 teaspoon baking soda
1/2 teaspoon salt
1 package (10 ounces) dark chocolate chunks
1/2 cup chopped pecans (omitted)

In a large bowl, cream butter and sugars until fluffy, 2 to 3 minutes, or until the mixture is a pale yellow color. Add egg and vanilla; beat until smooth. In a small bowl, combine flour, cocoa, baking powder, baking soda, and salt. Add dry ingredients to creamed mixture; stir until a soft dough forms. Stir in chocolate chunks and pecans.

Drop tablespoons of dough 2 inches apart onto an ungreased baking sheet. Bake at 375 for 8 minutes or until cookies are set and bottoms are lightly browned. Transfer cookies to a wire rack to cool.

June 26, 2012

Snickerdoodles with Biscoff "Frosting"

A few weeks ago, the hubby and I became obsessed with these cookies.


On their own, these snickerdoodles are great. Lots of cinnamony and sugary goodness. But with biscoff added to the mix...these cookies are dangerous. I bet you can't just eat one. 

I took a shortcut and instead of making a filling to sandwich between two cookies (like in the original recipe), I decided to "frost" them with biscoff spread. Best.decision.ever. We were eating these cookies like they were going out of style! I froze several bags of dough balls in one morning to take out once baby arrives- for our sanity, for when family and friends drop by. 

  
Our obsession decreased, gradually, and we moved on to chocolate chunk cookies...which are, I have to say, some of the best cookies I've ever made! I gotta make more though, we ate them all before pictures could be taken. ;) Stay tuned!

Source: Two Peas and Their Pod

 2 3/4 cups all-purpose flour
2 teaspoons baking powder
1/2 teaspoon salt
1 1/2 cups granulated sugar
1 cup butter, at room temperature
2 large eggs
2 tablespoons sugar
2 teaspoons cinnamon

1. Preheat oven to 350 F. Line a large baking sheet with parchment paper or a silicone baking mat. Set aside.

2. Sift together flour, baking powder and salt; set aside. Put butter and 1 1/2 cups sugar in the bowl of an electric mixer fitted with the paddle attachment. Mix on medium speed until pale and fluffy, about 3 minutes. Mix in eggs, one at a time. Reduce speed to low and gradually mix in flour mixture.

3. Stir together cinnamon and remaining 2 tablespoons sugar in a small bowl. Shape dough into balls, I used a heaping teaspoon of dough. Roll balls in cinnamon and sugar. Place cookie dough balls on prepared baking sheet and bake for 8-10 minutes, until edges are golden. Let cookies cool on baking sheet for 3 minutes and then transfer to a wire cooling rack.


June 21, 2012

Summer Garden Pasta

The summer months should be spent relaxing, reading, hanging by the pool, and taking long walks with an ice cream cone in hand. They shouldn't be about fancy dishes or long hours spent in the kitchen. Although, I will admit, I did roast a chicken the other day when it was 90 degrees out..what can I say, I suddenly have a lot of time on my hands (ie, school's out, I'm waiting for this baby to pop out, gotta keep myself busy somehow). 

Really though, I do find myself looking for easier meals to make in the summer: salads, quick pastas, new marinades for things to throw on the grill. I watched Ina Garten make this easy pasta dish one afternoon when I had no dinner plan in mind. I ran into the kitchen and gleefully cheered aloud that I had all necessary ingredients on hand. I added chicken to it as I need heavy amounts of protein lately (baby is HUNGRY) but it really isn't necessary. The flavors come together so well and if I could have a glass of wine, I totally would have with this!


Source: Foodnetwork

4 pints cherry tomatoes, halved
Good olive oil
2 tablespoons minced garlic (6 cloves)
18 large basil leaves, julienned, plus extra for serving
1/2 teaspoon crushed red pepper flakes
Kosher salt
1/2 teaspoon freshly ground black pepper
1 pound dried angel hair pasta
1 1/2 cups freshly grated Parmesan cheese, plus extra for serving

Combine the cherry tomatoes, 1/2 cup olive oil, garlic, basil leaves, red pepper flakes, 1 teaspoon salt, and the pepper in a large bowl. Cover with plastic wrap, and set aside at room temperature for about 4 hours.
Just before you're ready to serve, bring a large pot of water with a splash of olive oil and 2 tablespoons salt to a boil and add the pasta. Cook al dente according to the directions on the package (be careful - it only takes 2 to 3 minutes!). Drain the pasta well and add to the bowl with the cherry tomatoes. Add the cheese and some extra fresh basil leaves and toss well. Serve in big bowls with extra cheese on each serving.

June 5, 2012

Roasted Mini Apple "Pies"

Talk about cuteness overload.


I'm in love with these mini apple "pies."

This is one of the easiest, simplest, and quickest desserts I've ever made. I recently watched several hours of the Food Network. I was a complete couch potato (pregnancy allows for that though, right?) and jotted down a ton of new things I want to try before baby decides to make her arrival. In possibly 6 more weeks, yikes! These mini apple pies are one of the many I wrote down. I also happened to have everything in the fridge at that very moment, therefore, this is the first thing that I'm sharing with you. Another perk for this recipe- you might not need to make a special trip to the store!


I'm sure you could jazz it up and make some sort of caramel sauce to go with it. Which would be divine, mmmm. If you do that, tell me how it goes! But the simplicity of this can't be beat. Roll out your store-bought pie crust, slice some apples and toss them in cinnamon and sugar. Make your own whipped cream or dollop some out of a tub of Cool Whip. Dessert is ready under 15 minutes. 

Source: Foodnetwork

1 (9-inch) refrigerated rolled pie crust
2 medium Granny Smith apples, peeled
1/4 cup granulated sugar
1 tablespoon ground cinnamon, plus extra for dusting
1/2 cup heavy cream
2 tablespoons powdered sugar
cookie cutter or glass

Place an oven rack in the center of the oven. Preheat the oven to 400 degrees F. Line a baking sheet with a silpat or parchment paper sprayed with vegetable cooking spray.

Unroll the pie crust out on a work surface. Using a 3-inch round cookie cutter, cut out 8 disks of pastry. Arrange the pastry disks on the prepared baking sheet. Using the tines of a fork, prick the pastry all over. Bake until brown and crispy, 8 to 10 minutes. Remove to a wire rack to cool completely, about 10 minutes.

Slice the bottom of the apples to create an even surface for cutting. Slice each apple into 6 (1/2-inch) slices.
Cut each apple slice in half and remove any seeds or pieces of core. In a medium bowl, mix together the sugar and 1 tablespoon cinnamon. Add the apple slices and toss until coated. Shake off any excess mixture. Arrange the apple slices on the same baking sheet in a single layer. Bake until dark brown, about 12 to 15 minutes. Remove from the oven and let cool.

In a medium bowl, using an electric hand mixer, beat the cream until thick, about 1 minute. Add the powdered sugar and continue to beat until the cream is very thick.

To assemble the pies: Place the pastry disks on a work surface. Divide the cooked apple slices among 4 of the disks. Dollop about 2 tablespoons of the cream on top of the apples and cover with the remaining disks. Serve immediately.

May 30, 2012

Blackened Chicken Alfredo

It's that time again. Time to fire up those grills, drizzle on the olive oil, and sit outside on your patio. Summer has arrived, unofficially, and I've started to celebrate by doing everything previously mentioned and by making a batch of strawberry ice cream.

I love summer. Can't it stay forever? I love being able to throw on a dress, sandals, and walk right out of the house. No fuss. No sweaters, coats, or jackets to lug around. It's wonderful.

What else do I love about summer? Being able to sit outside with a book. Walk my dog around the neighborhood. Plant some flowers and hope they don't die (going on two weeks, yay potted plants!). Cute dresses. Cute shoes. The list can go on and on. And then there's the food.

I love grilling because:
1. No mess in the kitchen.
2. Almost everything comes out delicious.
3. Easy peasy meals.

While this recipe does require you to turn on the stove, it's well worth it. The chicken can easily be cooked inside, but grilling it is definitely the way to go. The first time we had this was in March, during that rare 80 degree week of glorious weather. It was devoured in minutes as we watched one of our 1213 DVR'd shows. It'll easily become a summer favorite.


Source: adapted from This Week for Dinner and Food.com

For the Chicken
2 boneless, skinless chicken breasts
1 teaspoon paprika
1/2 teaspoon cayenne pepper
1/2 teaspoon ground cumin
1/2 teaspoon dried thyme
1/2 teaspoon salt
1/4 teaspoon pepper
1/4 teaspoon onion powder

Pound the chicken thinly. Mix all of the spices together in a bowl. Season both sides of chicken with salt and pepper. Dip chicken in spice bowl and pat to coat both sides. Preheat grill to medium, or heat a non-stick skillet on medium and preheat oven to 350. If grilling, grill chicken for 5 minutes per side. If cooking indoors, place chicken in pan and brown both sides, 45-60 minutes per side. Transfer to oven and bake for 5-7 minutes. Slice chicken into strips.

For the Pasta Sauce
1 package of fettuccine or linguine
2 tablespoons butter
1 1/2 pints heavy cream
1/2 cup butter
3 tablespoons cream cheese
1/2 teaspoon garlic powder
1/2 cup grated parmesan cheese
1 cup cherry tomatoes
3/4 cup frozen spinach
Zest of lemon

Cook pasta according to package directions. Place 1 stick of butter and cream cheese in large saucepan on medium heat, let melt, stir in 1 pint of heavy cream. Let simmer for 5 minutes, stirring frequently. Slowly stir in the parmesan cheese, about 1/4 cup at a time.Add salt and pepper if desired. Simmer for about 20 minutes on low heat, stirring frequently. The longer this simmer's the better. If sauce seems to be real thick then slowly stir in the rest of heavy cream. Toss pasta with sauce, cherry tomatoes, and spinach. Pile sliced chicken strips on top and sprinkle with parmesan cheese and zest of lemon. 

April 11, 2012

Worcestershire Burgers with Mushroms, Swiss, and Ranch Dressing

Every now and then the craving for a big, juicy burger hits. I like my burgers with cheese, lettuce, sometimes tomato, and always, always, with a sauce/spread.


My favorite burger thus far is this caramelized onion burger. This burger comes in at a verrrrrry close second.  It's got cheese, point # 1, it's got mushrooms, point #2, and it's got a creamy, tangy sauce all over it, point #55. My mouth waters right now just thinking about eating it again.

I love making burgers at home. I rarely ever order one out at a restaurant. For some reason I consider a restaurant burger to be unhealthy- burgers made at home = healthy. I love my math skills. But truly, if I'm making a burger at home, I always use lean ground beef, sometimes grass-fed, and I don't over do it in the seasoning department. I like them simple. I also almost always top it with some kind of veggie, whether it be mushrooms, lettuce, tomatoes...and I use a whole wheat bun. Win win's all around. 


This burger is definitely one I can guarantee you'll want to add to your dinner rotations. "Sandwich" night can be fun and gourmet!

Source:  adapted from Rachael Ray Magazine

1 1/2 pounds ground sirloin
About 1/4 cup worcestershire sauce
3 tablespoons grated onion
coarse salt and pepper
1 tablespoon vegetable oil
4 deli slices swiss cheese
3 tablespoons butter
1 pound baby bella mushrooms, slices
1 shallot, finely chopped
1/2 cup sherry (I used chicken stock)
1 cup sour cream
1/4 - 1/3 cup buttermilk
1 teaspoon parsley
1/4 teaspoon thyme
1 tablespoon fresh lemon juice
1 teaspoon hot sauce
1 clove garlic, grated
Whole wheat buns

Preheat a cast-iron skillet or griddle pan over medium-high heat. Combine the beef, worcestershire, onion, salt and lots of pepper. Form into 4 patties (thinner at the center and thicker at the edges for even cooking). 

Add the oil to the hot pan, add the patties and cook, turning once, for 8 to 10 minutes for medium-rare to medium. Top the patties with the cheese, folded to fit the burgers, during the last 2 minutes of cooking.

Meanwhile, in a separate skillet, melt the butter over medium heat. Add the mushrooms and cook until browned, about 12 minutes. Add the shallot, season with salt and pepper and cook for 2 to 3 minutes more. Deglaze with chicken stock.

In a bowl, stir together the sour cream, buttermilk, herbs, lemon juice, hot sauce and garlic; season with salt and pepper.

Put the cheeseburgers on the roll bottoms and top with the mushrooms. Slather the roll tops with the dressing and set into place.

April 9, 2012

Thick and Chewy Chocolate Chip Cookies

The search for the best chocolate chip cookie recipe has ended in this household.


That's not to say that I won't be trying out more recipes and different versions of the chocolate chip cookie. But I have to say, I think these win, hands down, as the best classic, homemade, thick and chewy chocolate chip cookie. I've even got a second opinion- my hubby, who declared a few weeks ago that his favorite chocolate chip cookies were the ones he gets every day at work from the hospital cafeteria (they are really good). Not anymore! Take that lunch ladies.

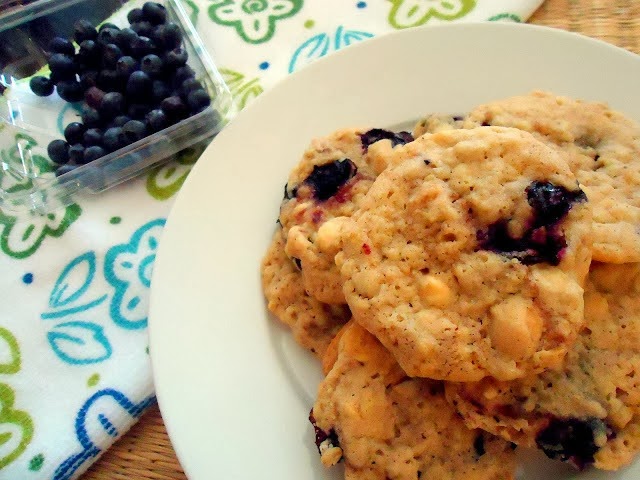
They're huge, perfectly sweet and fluffy. I'm beyond addicted to them. The perfect breakfast, lunch, or dinner snack for a pregnant woman. I could easily gain the rest of my pregnancy weight eating these babies. I'm totally planning on being that soccer mom with a jar of freshly baked cookies to dig in to every day after school. When baby arrives and has her first chocolate chip cookie, these will be it.


I highly suggest you follow the instructions to the 'T-' including clicking on the link to Brown Eyed Baker's illustration of how to roll these. Normally I skip those kinds of things because I'm lazy impatient, but it's totally worth it!

Source: Just Baked, orginally from Cook's Illustrated

2 cups plus 2 tablespoons (10 5/8 ounces) unbleached all-purpose flour
1/2 teaspoon baking soda
1/2 teaspoon salt
12 tablespoons (1 1/2 sticks) unsalted butter, melted and cooled until warm
1 cup packed (7 ounces) light or dark brown sugar I use light brown sugar
1/2 cup (3 1/2 ounces) granulated sugar
1 large egg and 1 egg yolk
2 teaspoons vanilla extract
1 to 1 1/2 cups semisweet chocolate chips

Adjust the oven racks to the upper- and lower-middle positions.  Preheat the oven to 325 degrees. Line 2 large baking sheets with parchment paper.

Whisk the flour, baking soda, and salt together in a medium bowl. Set aside. Either by hand or with an electric mixer, mix the butter, brown sugar, and granulated sugar until thoroughly blended. Beat in the egg, the yolk, and vanilla until combined. Add the dry ingredients and beat at low speed (or mix by hand with a spatula) just until combined. Stir in the chips according to your taste.

Roll a scant 1/4 cup of the dough into a ball. Hold the dough ball with the fingertips of both hands and pull into 2 equal halves. Rotate the halves 90 degrees and, with jagged surfaces facing up, join the halves together at their base, again forming a single ball, being careful not to smooth the dough’s uneven surface. Place the formed dough balls on the prepared baking sheets, jagged surface up, spacing them 2 1/2 inches apart. Brown Eyed Baker has a great illustration for this.

Bake until the cookies are light golden brown, the outer edges start to harden, and  yet the centers are still soft and puffy, 15 to 18 minutes, rotating the baking sheets front to back and top to bottom halfway through the baking time. Cool the cookies on the sheets

March 25, 2012

23 Weeks and Counting!

My 2nd trimester has been a breeze. I've had my energy and appetite back (despite the lack of recipes, truly, I have). I felt baby girl move for the first time at 18 weeks and love feeling her kicks throughout the day.

Valentine's Day- 18 weeks

I'm definitely on the small end (yay!) and haven't gained very much weight. AlthoughI to me, the weight I have gained is HUGE and we laugh at the size of my bulging belly. Really, it may not look like it in the pictures, but I definitely have a baby bump!

22 weeks

My clothes are starting to get a little tight- the dress in this picture barely had room for me to breathe. Maternity clothes are not all that flattering and I'm trying to find things with elastic waists or flowing tops so I don't have to venture into the maternity department. 

23 weeks

Pregnancy is definitely the reason for my lack of new recipes. It's harder to menu plan when I don't know what I'll be in the mood for. I've had a massive sweet tooth lately, which you'd think would provide me with more blog content, but before I can snap a picture most of what I've made is gone! And pregnancy brain really does exist. I forget to take pictures if I've made something new all the time now.

We are so excited to meet baby girl!

March 6, 2012

Bacon Mushroom Honey Dijon Chicken

Bacon and I have recently become BFF's.


BLT's are a huge pregnancy craving of mine. So much so that I ran home during my break one day to make a one and ate it back at work for lunch. I'm throwing bacon into salads, or rather, huge cobb salads that I'm also having a fling with. Bacon is in pasta. Bacon is in any wrap or sandwich I make. I heart bacon!


What I'm sharing with you today is by far my favorite thing that I've made with bacon. It tastes like something you'd get at a steakhouse, all smothered with cheese, mushrooms, bacon...with a slight hint of bbq sauce (even though no bbq sauce is used in this recipe). I'm obsessed with it and could eat it regularly if I allowed myself. It's quick enough to have on a weeknight, as long as you've marinated your chicken that morning or the night before. Make this, you won't be disappointed! As it cooks you can slice your mushrooms and fry up your bacon. I did make one change- my chicken was fully cooked before I topped it with everything. I let it hang out in the covered skillet so that the cheese could melt, heat on low.

Source: Mommy I'm Hungry
Serving:  2-4

1/2 cup Dijon mustard
1/2 cup honey
4-1/2 teaspoons canola oil, divided
1/2 teaspoon lemon juice
4 boneless skinless chicken breast halves
1/4 teaspoon salt
1/8 teaspoon pepper
Dash paprika
2 cups sliced fresh mushrooms
1 cup (4 ounces) shredded Monterey Jack cheese
1 cup (4 ounces) shredded cheddar cheese
8 bacon strips, cut and cooked
2 tbls sliced green onions

In a small bowl, combine the mustard, honey, 1-1/2 teaspoons oil and lemon juice. Pour into a large resealable plastic bag; add the chicken. Seal the bag and turn to coat; refrigerate for 2 hours.

Drain and discard marinade from chicken. In a large skillet over medium heat, brown chicken in remaining oil on all sides. Sprinkle with salt, pepper and paprika. Remove and set aside.

In the same skillet, saute mushrooms with cooked bacon until tender. Remove to set aside. Add chicken breasts to skillet, top with mushroom and bacon then cheeses and green onions.
Cook over low heat, covered for 15-20 minutes until juices run clear.

February 28, 2012

Chocolate Banana White Chocolate Chip Muffins

It's been a while since I've made a good batch of muffins. Now that I'm in my second trimester and things are tasting, smelling, and looking good, I'm finally enjoying sweets again. I didn't want to have anything to do with them in the beginning- so unlike me!


Now I feel great and I love being in the second trimester! We've gone baby crazy and have started our registry and I've bought a few things for our baby girl. I haven't been this excited for anything in so long, it is such an amazing feeling.


As for these muffins, I knew I had to make them the second I saw them on Dinners, Dishes, and Desserts. Her blog never disappoints. I've had them for breakfast as well as a "snack" to hold me over from one meal to the next (which is getting harder and harder to do, I'm always hungry). They are sweet without being too sweet, have just the right amount of chocolaty-ness, and I love the pop of using white chocolate chips.

Source: Dinners, Dishes, and Desserts

1/2 cup butter, softened
3/4 cup brown sugar
1 tsp vanilla
2 eggs
3 over ripe bananas, mashed
2 cups flour
1/4 cup + 2 Tbls cocoa powder
1 tsp baking soda
1/4 tsp salt
1 cup of white chocolate chips

Preheat oven to 350 degrees.  Prepare 12 cup muffin tin with cooking spray or liners.

In mixer bowl combine butter and sugar.  Beat until creamy.  Add eggs, banana, vanilla, and mix until well combined.   In a separate bowl whisk together flour, cocoa, baking soda and salt.  Add flour mixture to banana mixture and stir until just combined.  Fold in 3/4 cup of chocolate chips.  Pour into muffin cups.

Sprinkle remaining chips on top.  Bake for 18-20 minutes or until cooked through.  Cool for a few minutes in pan before serving.
 
BLOGGER TEMPLATE BY DESIGNER BLOGS