While the parentals were here, we grilled.
Look at my sweet hubby. The only time he gets involved with food! I guess he feels that it's a part of his man duties. Unless we're making cookies. He likes to help with that.
As you can see on the plate, there's a potato wedge. Don't worry, I got a lot more once I saw how fast they were going.
This chicken is super moist, juicy, and tender. And very tasty. I wanted to get more pictures, but with the all the excitement I barely remembered to snap a picture of my plate. Until someone mentioned, "Hey, aren't you going to take a picture of that?"
That's right familia. I am!
And of you too. :)
The original recipe is used to make kebobs. I don't have skewers yet so I used whole chicken breasts. I poured all the ingredients into two resealable plastic bags and turned the bags around several times, making sure to coat all the chicken with the marinade. I placed the bags into a bowl and marinated them overnight in the fridge.
Source: adapted from This Is So Good...
2 Tablespoons Dijon mustard
2 Tablespoons extra virgin olive oil
1 Tablespoon soy sauce
1 Tablespoon apple cider vinegar
4 garlic cloves, minced
1/4 cup basil, chopped fine
1 teaspoon sea salt
1/2 teaspoon freshly ground black pepper
2 pounds chicken breasts
In two large gallon size resealable bags, pour in the first nine ingredients (mustard through pepper). Add the chicken breasts, and make sure to coat all of the pieces. Cover and place in the refrigerator for at least 2 hours or overnight.
I've bombarded you with things to serve up at your next grill party. And speaking of... has anything caught your eye for the 4th?
June 30, 2011
June 28, 2011
Roasted Potato Wedges with Red Ranch Dressing
A few weeks ago I was curled up on the couch watching Down with the Neelys (don't you love them? I can't get enough of their sweet relationship). They were grilling up all kinds of things in the kitchen, but it was the potato wedges that caught my eye.
I've already made these about five times since then. They're currently my favorite version of french fries. I like that they're fat- I'm not a fan of thin, skinny fries. Call me a weirdo, what can I say. But what really makes them so unbelieveably good and delicious I want to eat them all day everyday is this dripping sauce.
It's not related to the Down with the Neelys episode. I found this baby in a Everyday with Rachael Ray magazine (a note to all who knock her, this is good, try it!!). I made it for the fam on their first night here and it was gone in two seconds flat. Okay, maybe not that quick, but it had certainly disappeared before I was even done with my corn on the cob.
For the Potato Wedges
Source: loosely adapted from Down Home with the Neelys
4 russet potatoes, scrubbed well
3 tablespoons olive oil
1 teaspoon paprika
Kosher salt and freshly ground black pepper
Slice each potato into 6 wedges. Add the potato wedges to a pot of cold salted water. Bring to a boil, reduce heat, and simmer until the potatoes are barely tender, but a knife can be pushed through with just a slight resistance, about 6 minutes. Drain potatoes and add to a large mixing bowl. Drizzle potatoes with olive oil and toss with paprika, salt, and pepper.
Carefully remove the hot sheet tray from the oven and quickly add the seasoned potatoes to them. You want the pan to stay as hot as possible. This will help to crisp up the potatoes while they roast. Place the sheet pan back into the oven and roast until golden and crisp, 20 to 25 minutes, flipping 1/2 way through the cooking time.
Cook's Note: Be careful not to overcook the potatoes when boiling. You don't want them to fall apart when you roast them. Heating your sheet tray in the oven will promote crispness in your potatoes wedges. The potatoes start sizzling and crisping up as soon as they hit the hot pan.
For the Ranch Dressing
Source: Everyday with Rachael Ray
1/2 cup buttermilk
1/2 cup sour cream
1/4 cup organic or low-sodium ketchup
1 large clove garlic, grated or pasted
3 -4 tbsp, finely chopped mixed fresh herbs, such as chives and parsley
1 tbsp fresh lemon juice
Salt and coarse black pepper
Hot sauce, to taste (omitted)
In a small bowl, combine 1/2 cup each buttermilk and sour cream, the ketchup and garlic, herbs, and lemon juice; season with salt, pepper and hot sauce to taste.
What's your favorite cooking show? I watch Giada, Rachael, Emeril, and the Neelys.
I've already made these about five times since then. They're currently my favorite version of french fries. I like that they're fat- I'm not a fan of thin, skinny fries. Call me a weirdo, what can I say. But what really makes them so unbelieveably good and delicious I want to eat them all day everyday is this dripping sauce.
It's not related to the Down with the Neelys episode. I found this baby in a Everyday with Rachael Ray magazine (a note to all who knock her, this is good, try it!!). I made it for the fam on their first night here and it was gone in two seconds flat. Okay, maybe not that quick, but it had certainly disappeared before I was even done with my corn on the cob.
For the Potato Wedges
Source: loosely adapted from Down Home with the Neelys
4 russet potatoes, scrubbed well
3 tablespoons olive oil
1 teaspoon paprika
Kosher salt and freshly ground black pepper
Place a rimmed sheet tray into the oven and preheat oven to 450 degrees F.
Carefully remove the hot sheet tray from the oven and quickly add the seasoned potatoes to them. You want the pan to stay as hot as possible. This will help to crisp up the potatoes while they roast. Place the sheet pan back into the oven and roast until golden and crisp, 20 to 25 minutes, flipping 1/2 way through the cooking time.
Cook's Note: Be careful not to overcook the potatoes when boiling. You don't want them to fall apart when you roast them. Heating your sheet tray in the oven will promote crispness in your potatoes wedges. The potatoes start sizzling and crisping up as soon as they hit the hot pan.
For the Ranch Dressing
Source: Everyday with Rachael Ray
1/2 cup buttermilk
1/2 cup sour cream
1/4 cup organic or low-sodium ketchup
1 large clove garlic, grated or pasted
3 -4 tbsp, finely chopped mixed fresh herbs, such as chives and parsley
1 tbsp fresh lemon juice
Salt and coarse black pepper
Hot sauce, to taste (omitted)
In a small bowl, combine 1/2 cup each buttermilk and sour cream, the ketchup and garlic, herbs, and lemon juice; season with salt, pepper and hot sauce to taste.
What's your favorite cooking show? I watch Giada, Rachael, Emeril, and the Neelys.
June 27, 2011
Carolina-Style Barbecue Chicken
With summer in full swing I have the itch to grill everything. I love our grill and I'm so glad we finally caved in and bought one. So far we've grilled burgers (with a few complications...), corn on the cob, asparagus, chicken breasts, flank steak, and chicken thighs. We're getting better at this thing. And I can actually say "we" because the hubbs is out there with me. :)
These chicken thighs are by far the tastiest thing we've grilled. Not having to marinate these overnight is a huge bonus for me, as I tend not to read through an entire recipe (I'm still working on that) and disappoint myself when I realize the meat needs to be marinated and we won't be able to eat it until the next day. When will I learn...
I had most of these ingredients on hand. I used dijon instead of yellow mustard and omitted the hot sauce. I also halved the recipe, since we used four chicken thighs instead of 8. Our only issue was the cook time- about 20 to 25 minutes, with us checking often to see if they were done.
Source: Food Network
1/2 cup yellow mustard (I used dijon mustard)
1/4 cup apple cider vinegar
1/4 cup packed light brown sugar
1 1/2 tablespoons mustard powder
2 teaspoons hot sauce (omitted)
1/2 teaspoon Worcestershire sauce
Kosher salt and freshly ground pepper
2 tablespoons unsalted butter, melted
8 skin-on, bone-in chicken thighs (2 to 2 1/4 pounds)
Season the chicken with salt and pepper, then toss with about one-third of the mustard sauce in a large bowl until coated. Let sit at room temperature, 10 minutes.
Brush the grill grates generously with vegetable oil. Put about 1/4 cup of the remaining mustard sauce in a small bowl for basting and reserve the rest for topping. Grill the chicken, covered, basting occasionally with the sauce, until well marked and a thermometer inserted into the thickest part registers 170 degrees F, 10 to 12 minutes per side. Serve the chicken with the reserved mustard sauce.
What are you planning on cooking/baking/grilling for the 4th of July?
These chicken thighs are by far the tastiest thing we've grilled. Not having to marinate these overnight is a huge bonus for me, as I tend not to read through an entire recipe (I'm still working on that) and disappoint myself when I realize the meat needs to be marinated and we won't be able to eat it until the next day. When will I learn...
I had most of these ingredients on hand. I used dijon instead of yellow mustard and omitted the hot sauce. I also halved the recipe, since we used four chicken thighs instead of 8. Our only issue was the cook time- about 20 to 25 minutes, with us checking often to see if they were done.
Source: Food Network
1/2 cup yellow mustard (I used dijon mustard)
1/4 cup apple cider vinegar
1/4 cup packed light brown sugar
1 1/2 tablespoons mustard powder
2 teaspoons hot sauce (omitted)
1/2 teaspoon Worcestershire sauce
Kosher salt and freshly ground pepper
2 tablespoons unsalted butter, melted
8 skin-on, bone-in chicken thighs (2 to 2 1/4 pounds)
Preheat a grill to medium. Whisk the yellow mustard, vinegar, brown sugar, mustard powder, hot sauce, Worcestershire sauce, 1/2 teaspoon salt, and pepper to taste in a bowl. Whisk in the butter.
Season the chicken with salt and pepper, then toss with about one-third of the mustard sauce in a large bowl until coated. Let sit at room temperature, 10 minutes.
Brush the grill grates generously with vegetable oil. Put about 1/4 cup of the remaining mustard sauce in a small bowl for basting and reserve the rest for topping. Grill the chicken, covered, basting occasionally with the sauce, until well marked and a thermometer inserted into the thickest part registers 170 degrees F, 10 to 12 minutes per side. Serve the chicken with the reserved mustard sauce.
What are you planning on cooking/baking/grilling for the 4th of July?
June 20, 2011
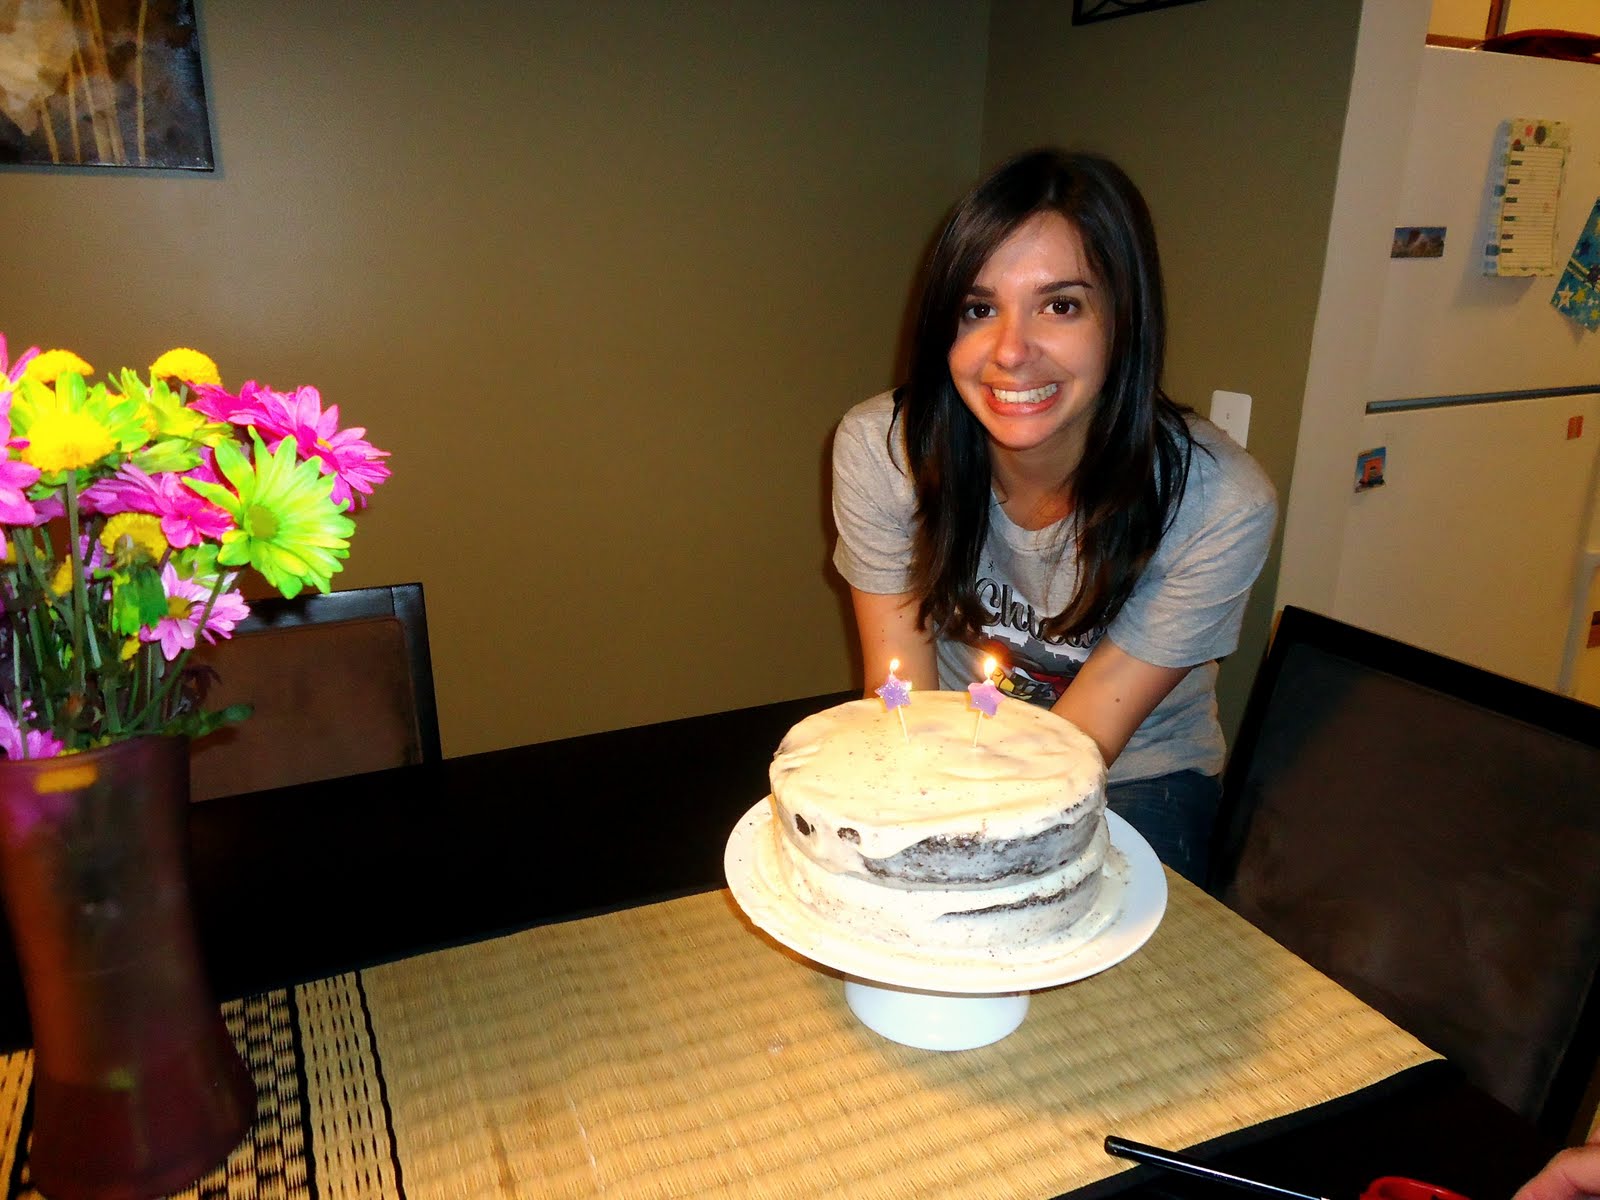
Sour Cream Chocolate Cake- It's My Birthday!
Happy Birthday to meeee, Happy Birthday to meee...Yesterday was my birthday, yeah! The fam is here from Miami visiting, so bear with me on the lack of posts this week. I'll try my best to share with you some of the sweet treats I've made for them, starting with my special chocolate birthday cake, that my Dad and I made together.
I didn't have enough sour cream (kind of ridiculous, I know, seeing as it is called a sour cream cake) but we were tired from our long drive home from Chicago and didn't want to go back out to buy one. And I had to have a birthday cake! So we improvised.
We used yogurt.
It was amazing. One of the best I've ever made (with help, thanks Dad!). Super moist, perfect amount of chocolate-ness, I'll make it again and again. And maybe not with a full cup of sour cream. I wonder if that was because of the yogurt?
I'm not including the recipe I used for the frosting because it was...meh. It tasted great, but the consistency was way off, runny and super thin. Still on the search for the perfect frosting!
Source: Daisy Brand.com
3/4 cup vegetable oil
1 egg
2 teaspoon vanilla extract
1 cup packed light brown sugar
1/2 cup granulated sugar
2 (1-oz) squares semi-sweet baking chocolate, melted
2 cups all-purpose flour
2/3 cup unsweetened cocoa powder
1 tablespoon baking soda
1/2 teaspoon salt
1 cup warm water
1 cup sour cream (I used 1/2 cup sour cream & 1/2 cup vanilla yogurt)
Heat oven to 350. In a large mixing bowl, beat vegetable oil, egg, and vanilla for 1 minute at medium speed; add sugars and beat 1 minute; add melted chocolate and beat 1 minute.
In a small bowl, combine flour, cocoa powder, baking soda, and salt, then add to chocolate mixture alternately with water, beating well after each addition. Add sour cream and mix well. Pour into two greased and floured 8-inch round pans and bake 30-35 minutes. Cool for 10 minutes, then remove from pans to cool completely before frosting.
Just wait until you see the other cooking tools I got for my birthday... :)
I didn't have enough sour cream (kind of ridiculous, I know, seeing as it is called a sour cream cake) but we were tired from our long drive home from Chicago and didn't want to go back out to buy one. And I had to have a birthday cake! So we improvised.
We used yogurt.
It was amazing. One of the best I've ever made (with help, thanks Dad!). Super moist, perfect amount of chocolate-ness, I'll make it again and again. And maybe not with a full cup of sour cream. I wonder if that was because of the yogurt?
I'm not including the recipe I used for the frosting because it was...meh. It tasted great, but the consistency was way off, runny and super thin. Still on the search for the perfect frosting!
Source: Daisy Brand.com
3/4 cup vegetable oil
1 egg
2 teaspoon vanilla extract
1 cup packed light brown sugar
1/2 cup granulated sugar
2 (1-oz) squares semi-sweet baking chocolate, melted
2 cups all-purpose flour
2/3 cup unsweetened cocoa powder
1 tablespoon baking soda
1/2 teaspoon salt
1 cup warm water
1 cup sour cream (I used 1/2 cup sour cream & 1/2 cup vanilla yogurt)
Heat oven to 350. In a large mixing bowl, beat vegetable oil, egg, and vanilla for 1 minute at medium speed; add sugars and beat 1 minute; add melted chocolate and beat 1 minute.
In a small bowl, combine flour, cocoa powder, baking soda, and salt, then add to chocolate mixture alternately with water, beating well after each addition. Add sour cream and mix well. Pour into two greased and floured 8-inch round pans and bake 30-35 minutes. Cool for 10 minutes, then remove from pans to cool completely before frosting.
Just wait until you see the other cooking tools I got for my birthday... :)
June 17, 2011
Frozen Chocolate Peanut Butter Pie
Hold your horses folks. Summer time has just arrived and it's going to stay for awhile (it better or I'm gonna have problems with mother nature.) I've got the perfect pie for you to make for all your summer cookouts.
This pie is sensational. I'm a huge peanut butter fan, so if you're not, I'm not sure how you'd feel about this pie. It just might convert you though. You'll become a peanut butter worshiper.
But I'm sure you like chocolate, right?! And cream cheese. Whipping cream. Oh and how can I forget....Oreo's. It's got an Oreo crust folks. If you don't like Oreo's then I don't know what to do for you.
The first time I made this I was blown away. Although, I'm not gonna lie, I was pretty upset with how the crust turned out. It.was.stuck.to.the.pie.plate! There I was chiseling at the pie plate in front of guests, reminding myself of that when-you-invite-guests-over cordial rule- don't make something new! I'm not sure if I baked the crust for too long (even though I followed the recipe) or if the pie was still too frozen (I was able to cut through the filling just fine) but something was off. I was able to scrape the crust off with a fork and serve it alongside the pie filling so it still had the same effect as if the crust was actually attached to the slice. This time around I baked it for less time and while it was easier for the crust to come off the pie plate, it still wasn't sticking to the filling as much as I would have liked. Oh well. Don't let that discourage you from making this. It will still be just as scrumptiously peanut buttery wonderful.
Next time I might try a different method. Maybe even go so far as to buy a pre-made crust. Shudder.
Source: Tracey's Culinary Adventures
Crust
1 3/4 cups chocolate cookie crumbs
6 tablespoons unsalted butter, melted
3 tablespoons dark brown sugar
pinch salt
Filling
6 oz cream cheese, at room temperature
3/4 cup confectioners' sugar
1 teaspoon kosher salt
1 1/4 cups peanut butter (smooth, not natural or chunky)
1 tablespoon vanilla extract
2 cups heavy cream
Garnish
1 oz semisweet chocolate, finely chopped
2 tablespoons peanut butter
To make the crust: Preheat oven to 350 F. Combine the cookie crumbs, brown sugar and salt in a medium bowl. Add the butter and toss with a fork until all of the crumbs are moistened (the mixture will be quite wet). Press into the bottom and up the sides of a 9-inch pie plate. Refrigerate for about 15 minutes so the crust is firm, then bake until set, about 8-10 minutes. Transfer to a wire rack to cool completely.
To make the filling: In the bowl of a stand mixer fitted with the paddle attachment, beat the cream cheese, confectioners' sugar and salt on medium speed until light and fluffy, about 2 minutes. Mix in the peanut butter and vanilla. (If you don't have a second bowl for your stand mixer either transfer the cream cheese mixture to another bowl and wash the first, or do the next step with a hand mixer.) Switch to the whisk attachment on your mixer and beat the heavy cream until you have soft peaks. Take about 1/3 of the whipped cream and stir it into the cream cheese mixture to lighten it. Use a rubber spatula to gently fold in the remaining 2/3 of the whipped cream. Transfer the filling to the cooled crust and spread in an even layer. Freeze uncovered for at least 4 hours or up to 1 day covered with plastic wrap.
To garnish the pie: Put the chocolate in a microwave-safe bowl and heat in 30 second bursts at 50% power, stirring in between each burst. Continue until the chocolate is melted and smooth. Transfer to a resealable plastic bag and snip a tiny bit off the corner. Hold the bag over the pie and drizzle the melted chocolate in a zig-zag pattern. Put the peanut butter in a small saucepan set over low heat and melt it, stirring frequently. Add the melted peanut butter to a resealable plastic bag, snip off a corner and drizzle over the pie. Let stand for about 10 minutes to set.
Remove the pie from the freezer about 10-15 minutes before you are ready to serve. If you have trouble cutting it, running your knife under warm water will help.
This pie is sensational. I'm a huge peanut butter fan, so if you're not, I'm not sure how you'd feel about this pie. It just might convert you though. You'll become a peanut butter worshiper.
But I'm sure you like chocolate, right?! And cream cheese. Whipping cream. Oh and how can I forget....Oreo's. It's got an Oreo crust folks. If you don't like Oreo's then I don't know what to do for you.
The first time I made this I was blown away. Although, I'm not gonna lie, I was pretty upset with how the crust turned out. It.was.stuck.to.the.pie.plate! There I was chiseling at the pie plate in front of guests, reminding myself of that when-you-invite-guests-over cordial rule- don't make something new! I'm not sure if I baked the crust for too long (even though I followed the recipe) or if the pie was still too frozen (I was able to cut through the filling just fine) but something was off. I was able to scrape the crust off with a fork and serve it alongside the pie filling so it still had the same effect as if the crust was actually attached to the slice. This time around I baked it for less time and while it was easier for the crust to come off the pie plate, it still wasn't sticking to the filling as much as I would have liked. Oh well. Don't let that discourage you from making this. It will still be just as scrumptiously peanut buttery wonderful.
Next time I might try a different method. Maybe even go so far as to buy a pre-made crust. Shudder.
Source: Tracey's Culinary Adventures
Crust
1 3/4 cups chocolate cookie crumbs
6 tablespoons unsalted butter, melted
3 tablespoons dark brown sugar
pinch salt
Filling
6 oz cream cheese, at room temperature
3/4 cup confectioners' sugar
1 teaspoon kosher salt
1 1/4 cups peanut butter (smooth, not natural or chunky)
1 tablespoon vanilla extract
2 cups heavy cream
Garnish
1 oz semisweet chocolate, finely chopped
2 tablespoons peanut butter
To make the crust: Preheat oven to 350 F. Combine the cookie crumbs, brown sugar and salt in a medium bowl. Add the butter and toss with a fork until all of the crumbs are moistened (the mixture will be quite wet). Press into the bottom and up the sides of a 9-inch pie plate. Refrigerate for about 15 minutes so the crust is firm, then bake until set, about 8-10 minutes. Transfer to a wire rack to cool completely.
To make the filling: In the bowl of a stand mixer fitted with the paddle attachment, beat the cream cheese, confectioners' sugar and salt on medium speed until light and fluffy, about 2 minutes. Mix in the peanut butter and vanilla. (If you don't have a second bowl for your stand mixer either transfer the cream cheese mixture to another bowl and wash the first, or do the next step with a hand mixer.) Switch to the whisk attachment on your mixer and beat the heavy cream until you have soft peaks. Take about 1/3 of the whipped cream and stir it into the cream cheese mixture to lighten it. Use a rubber spatula to gently fold in the remaining 2/3 of the whipped cream. Transfer the filling to the cooled crust and spread in an even layer. Freeze uncovered for at least 4 hours or up to 1 day covered with plastic wrap.
To garnish the pie: Put the chocolate in a microwave-safe bowl and heat in 30 second bursts at 50% power, stirring in between each burst. Continue until the chocolate is melted and smooth. Transfer to a resealable plastic bag and snip a tiny bit off the corner. Hold the bag over the pie and drizzle the melted chocolate in a zig-zag pattern. Put the peanut butter in a small saucepan set over low heat and melt it, stirring frequently. Add the melted peanut butter to a resealable plastic bag, snip off a corner and drizzle over the pie. Let stand for about 10 minutes to set.
Remove the pie from the freezer about 10-15 minutes before you are ready to serve. If you have trouble cutting it, running your knife under warm water will help.