Pages

December 31, 2013

Mulled Wine- Guest Post

Today Megan, from one of my favorite blogs, is here to share with you a special treat for the holidays, mulled wine! I hope you'll take a minute to check out her blog, I'm sure you'll love her and her daughter Sofia!

Hi everyone! I'm Megan from Hello Newlywed Life; wife to Mike & Mama to Sofia.
 I work full-time & drink part-time! ;)
Mike and I both have busy schedules, so when we have a second to relax, we like to make fun drinks together. A staple at our house during the holiday season is mulled wine. If you've never had a sip, it's wine infused with clove, cinnamon, allspice, star anise & lots of citrusy orange flavor!
Heaven in a mug.
What to buy:
Bottle of wine (Merlot of Cab Sauv works best)
Mulling Spice (This Target blend is my favorite & it's the cheapest around)
Orange, sliced
1/4c sugar
*If using loose spice mix, put into cheesecloth or a tea ball
Right-click the picture above to print recipe
Hope you're having a great holiday season (filled with plenty of drinks!) & wishing you a HAPPY NEW YEAR from our family to yours!!!

December 30, 2013

New York Style Cheesecake- Guest Post

I'm so grateful to Amanda for guest posting for me today. I hope you'll take a minute to visit her blog! I'm still visiting my family in Florida and will be back to blogging later on this week. Check out this delicious cheesecake, one of my favorite desserts!

Hi! My name is Amanda and I blog over at Kids and Cabernet.  I blog about my kids, life, and my favorite wine finds - sometimes a mamma just needs a bottle glass of wine ;).  I was so honored when Christina asked me to guest post!  I love her blog - her recipes always look SO good.  Let's see if I can hold a candle to her baking skills!


I'm not a huge dessert person, but one thing I'll never turn down is cheesecake!  I was so happy when my mother-in-law shared this recipe that she's been making for years.  It is a very easy recipe to make.  The only trick that I've learned when making a cheesecake is that you really need to make sure that it's blended really good so that your cheesecake doesn't come out lumpy.

New York Style Cheesecake
Ingredients
4 – 8oz cream cheese squares
2 cups sugar
4 eggs
1 tsp vanilla extract
2 cups sour cream (add last)

Crust
1 cup gram cracker crumbs
2-3 tbsp melted butter
1/8 cup sugar 
Mix all together and press into bottom of 10” spring form pan


Preheat oven to 350*.  Put graham cracker crust at bottom of greased and floured pan. Combine all ingredients except sour cream in large bowl and mix until smooth (it won’t be totally smooth, but pretty close).  Add sour cream and blend.  Pour into pan and bake until edges of cake are golden brown and center is moist (about 1hr. 15min.).  Let cool completely and then refrigerate over night.  Add topping if desired.  

For the topping I like to take berries, add sugar, cover and let it sit for a few hours.  This draws the liquid out of the berries and makes for a delicious, fresh and sweet topping. 

I hope you all enjoy this recipe as much as I have!


December 25, 2013

Merry Christmas!


From our family to yours, 
we wish you 
a very 
**Merry Christmas!**


We are soaking up the sun, spending time with our family and friends, and enjoying the rest of what 2013 has to offer. See you next year! ;)

December 23, 2013

Slow Cooker Pot Roast

Are you looking for an easy meal to entertain with this week? With family and friends in town or dropping by, this is a great dinner to serve for company. Pot roast is one of those meals that has a bad reputation. Some people love it, and some people hate it. My husband hated it. I grew up hating it, so as an adult, pot roast never sounded appealing to me, and it didn't to him when I told him what we were having for dinner that night.

Until we had a bite! Oh my word, this is good. This is a keeper folks. Leave it to the crock pot to change things around. How I love that thing.


I think all the prep that goes into this before it goes into the crock pot is what makes this so delicious. It's not a drop and dump crock pot recipe. There is some work to do before the cooking gets started. Peeling the carrots, chopping the onions, obviously, but what you might not do before you put something in the crock pot is cook it a little first on the stove. Well, not really cook- but sear. You want to lock in some flavor first. I'm convinced that is the key.  


So yes, if you are leaving to work in the morning, this will take some time. Maybe you'll want to save it for the weekend. Or if you're a SAHM, then use it on a day you know you're going to be busy most of the afternoon, and prep it in the morning. You'll be so happy you did!

Source: adapted from this recipe
Servings: 4-6 people (this makes a lot of leftovers)

3-4 tbsp olive oil
6 carrots, peeled, and diced (use more or less if you like)
1 yellow onion, cut into quarters  
4-5 pound boneless chuck roast
1 tbsp flour
1 cup red wine (I used chicken stock)
1 1/2 cup chicken or beef stock
3 cloves garlic, crushed
1 tsp dried thyme
2 tsp dried rosemary

Spray your crock pot with cooking spray. Heat a large pot over medium-high heat. Pour 2 tablespoons of olive oil into the pot.  Add the carrots and onions. You want to brown them well on all sides, 4-5 minutes (you're not trying to cook them, you just want them to have some color). Once you see them starting to brown, pour the carrots and onions into the crock pot.  

Add another tablespoon or so of olive oil to the pot you cooked the veggies in. Generously salt and pepper the chuck roast. Place the roast into the pot and sear for about 2-3 minutes on each side until nicely browned. Remove the roast and add to the crock pot, using tongs. You don't want to pour any of the juices into the crock pot just yet!!

Add a tablespoon of flour to the oil. Grab a whisk and start to whisk the flour, while you pour in the red wine or chicken stock to the pot. Continue to whisk to deglaze the bottom on the pan. Let it simmer on the stove for about five minutes, until the liquid has thickened up just a bit. Pour the mixture into the crock pot, along with the other 1 1/2 cup of beef or chicken stock (the liquid should be about half way up the meat, don't add more than that). Add the crushed garlic, thyme, and rosemary. Cook on low for 6 hours. 

I served mine with roasted potatoes and garlic bread. I wouldn't add the potatoes to the crock pot, because they get so mushy, unless you like them that way. Enjoy!

December 20, 2013

Chocolate Pudding Cookies

Before holiday baking is over, I have to share with you one more treat. Maybe you're still looking for something to give to a friend or neighbor, or for Christmas morning while you're opening presents. I wish I had baked these cookies sooner, because I would have definitely made more than one batch, they are that good!


I found these fun festive white chocolate chips at Aldi a few weeks back and knew I had to have them. The original recipe calls for peppermint chips, which I'd love to try next time I make these cookies. 


These are easy to make and you probably have all the ingredients already in your pantry. The only thing I didn't have were the festive chips and chocolate pudding mix. Otherwise, we were good to go! 

I baked them to take to a friend's house and they were eagerly snatched up, by me, my husband, our friends, and of course, Miss A. She hasn't met a cookie she doesn't like!


Source: adapted from I Heart Naptime

3/4 cup butter, softened
3/4 cup brown sugar, packed
1/4 cup sugar
1 small package chocolate dry pudding mix
2 eggs
1 tsp. vanilla extract
1 tsp. baking soda
2 1/4 cups flour
1 cup festive white chocolate chips, or crushed peppermint candies
1 cup semi-sweet chocolate chips


Preheat oven to 350. In a large bowl, cream together the butter and sugars until combined. Add in the dry instant pudding mix and mix again, just until combined. Add eggs and vanilla; mix. Next, add the flour and baking soda and beat until well incorporated. Stir in the white chocolate baking chips and semi-sweet chocolate chips. 

Use a cookie scoop (or tablespoon), drop cookie dough on to baking sheets lined with parchment paper. Bake 8-10 minutes. Mine were done at 10 minutes. Best served warm!

December 17, 2013

Christmas Pictures 2013

Last year I didn't have any photo cards printed for our Christmas cards. I dressed Miss A up in a cute "My 1st Christmas" outfit and sent them along with a regular card to friends and family.

This year I was contacted by Tiny Prints to try their cards. I absolutely loved the selection to choose from and went with this design.

We didn't have professional photos done, as we're still new to the area and haven't found a photographer yet. I asked my dad to take some pictures of us while he was here for Thanksgiving.

We went with this photo for our Christmas cards! Miss A was NOT in a picture-taking mood, so this was the best one out of the bunch.


We also took some pictures while we were out searching for a Christmas tree.


And this is after we finished decorating the tree! I really do love this picture, Miss A is finally smiling, but it's indoors, I had changed out of my red dress, and I don't love the lighting of indoor pictures. Plus, I've got some weird crazy eyes happening here!


Overall I'm happy with the photo we chose and I hope to take one every year. I plan on starting a new tradition- adding a family photo ornament to the tree every year. How fun will that be to see our family change and grow as we unwrap each ornament. I can't wait!

December 16, 2013

Gingerbread Cookies

Over the weekend Miss A and I did some baking. Our sweet neighborhood had a caroling event, complete with hot chocolate and cookies at the end of the night. While I would  have loved to go, I figured taking Miss A out in the cold, by ourselves, at night, might not be such a good idea (hopefully next year my husband will have the night off!) Even still, I never pass up a chance to bake Christmas cookies, and signed up right away.


We made gingerbread cookies, using all my Christmas cookie cutters. Can you believe there wasn't a gingerbread man cutter in my set? I'll have to pick one up for next year!


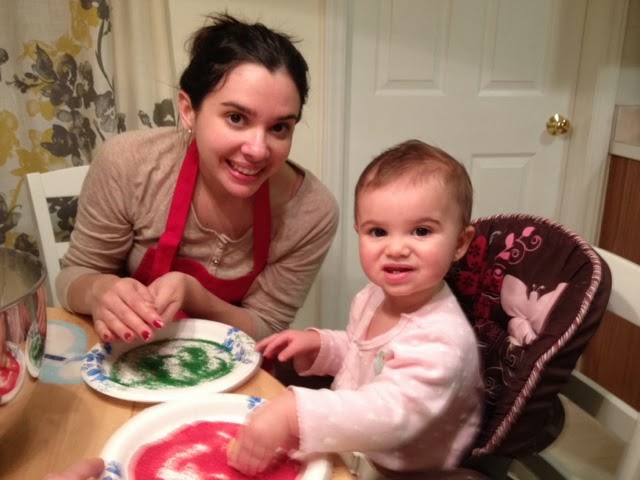
Miss A was much more interested in the cookie cutters themselves instead of trying to help Mama. She took them in and out of the container, "counting", one at a time. When she was bored of that, she played with her own ball of dough and I'm happy to report she only tried to eat it once!


For the icing, I found this amazing little pouch at Aldi, with a spout, and it is one of the best baking items I've ever purchased. It made frosting the cookies SO easy. No mess with powered sugar, no stress over overdoing the frosting. I lined the cookies with the icing and then spread a little more in the center and used a butter knife to fill in the rest. Then I sprinkled the cookies with green and red sprinkles. After about 4 hours, the frosting has set, and you can stack the cookies!


I found this recipe in a magazine a few weeks ago, but can't remember which one. So forgive me for not having the source. A word of caution- this makes A LOT of cookies. I cut the entire recipe in half, but included the original for you here.


Gingerbread Cookies
Serves: 8 dozen

1 1lb box of dark brown sugar
3 sticks unsalted butter, softened
1/3 cup molasses
2 large eggs, at room temperature
6 cups all-purpose flour
2 tbsp cinnamon
2 tbsp ginger
1 1/2 tsp all-spice
1 1/2 tsp baking soda
1 tsp salt

Combine sugar and butter in a large mixing bowl with an electric mixer. Beat until combined. Add the molasses and eggs, one at a time.

In another bowl, whisk together the dry ingredients. Slowly add the dry ingredients to the wet, mixing at a very low speed. You might need to use your hands to help the dough form. Once the dough comes together, it will be very thick. Divide dough into four parts and wrap each with plastic wrap.

Preheat the oven to 375. On a lightly floured surface, roll-out one portion of dough to 1/4 inch thickness. I had to knead my dough a bit before I could roll out it. You might need to add more flour if the dough is too sticky. Cut out shapes and place on a baking sheet, lined with parchment paper. Make sure cookies are 1 inch apart and bake for 8-10 minutes. Cool completely before removing cookies from the pan. Decorate as desired.

Happy Baking!

December 13, 2013

Five on Friday- Toddlers, Christmas, Family

Happy Friday! As usual I'm linking up with the ladies for Five on Friday.

1. Toddlers


Our little miss has been throwing us for a loop lately with her naps. Usually she takes one nap, in the early afternoon, and sleeps for about an hour and a half to two hours. All week long she has flat out refused to nap, until around 3:00pm or so. What gives?! I'll lay her down in her crib and hear her sing, talk, and then start to call out "MAMAAAA!!" We also had a night that she was up with Mama and Dada until 11:00pm! Oh toddlers. I never know what to expect sometimes!

2. Christmas Cards


Our Christmas cards came in the mail this week and I'm so excited to send them out! I'll share how they turned out after they're all mailed and received. We went with this design from Tiny Prints and we couldn't be happier. We've already started receiving cards and I'm thinking of a way to display them. I love this idea from Martha Stewart above. Do you display Christmas cards?

3. Victoria Secret Fashion Show


Did you catch the Victoria Secret Fashion Show earlier this week? I don't know about you, but I look forward to it every year! I think of it as the ultimate girl power hour. They always have great live performances, amazing get-ups, and I sit and watch it with a bag of cookies or chocolate and bounce around. Great fun. :)

4. Family Time


We had a great family day yesterday. After not seeing her Dad very much for the last few days, Miss A was SO happy to have him home. We went out to lunch and made a trip to the mall to walk around and attempt to see Santa. She saw him from far away and seemed interested, so we got closer, and he waved to her. She waved back but then immediately clung to me. Haha. So no, we didn't even attempt to get a picture with Santa. Maybe next year?

5. Candy Cane Kiss Cookies


We made our second batch of Christmas cookies and these were delicious! She loved rolling around the balls of dough in the sprinkles and I'm happy to say only tried to eat the raw dough once! I'll be making them again this weekend for a neighborhood caroling event.

Have a great weekend!

December 12, 2013

Christmas Home Tour

I love decorating for the holidays and Christmas is my favorite holiday to decorate for. It's my favorite time of the year! We don't have much, even though my husband says we have plenty, but after living in an apartment for the last four years, I definitely need more to decorate an entire house!

We've lived in our house for almost six months already. Six! I can't believe how fast time has flown, it really does feel like we moved in yesterday. I struggled with how to decorate certain rooms and where to put things; this is how our home looks now.

The Mantle

Hanging the stocks with care. I bought plain stockings last year so that the four of them could match. I like decorating and personalizing things on our own, so we used glitter glue to write our names on them. Yes, our dog has a stocking. She was our 1st baby, right? She gets presents on Christmas too!


I got the stocking hangers last year at Target. They work beautifully on the mantle, however, a certain someone tried to pull down the stockings the other day and I had to take them off. Now they hang on clear command hooks. Problem solved!


I added stick-on glitter stars (that I got at Michaels) for even more of a festive touch. The "believe" blocks are from Meijer, also purchased last year. 


The Kitchen 

Our breakfast bar is an area I wasn't sure what to do with. I got these cute penguin plate sets years ago from Target. I thought this would be a good place to display them. 


I always buy Christmas candy and have it out somewhere. These candy cane Hershey kisses are my favorite! 


In the kitchen I've got a printable that I framed, my favorite peppermint candle, our snowman cookie jar (Target) and snowman placemats. 


The Living Room

O Christmas tree, O Christmas tree! I love how magical a Christmas tree can transform any room. The living room feels even more homey and I want to spend as much time as I can in this room. Only problem is, Miss A loves the tree!! I've taught her to wave "hello" and to Ooo and ahhh from a distance. So far is working...until curiosity gets the best of her and she wants a BALL!!


A few special ornaments- I bought this "our new home" key last week at TJ Maxx to represent our first home. 


My mom had this ornament personalized for us after we got married. 


Miss A's first Christmas ornament. I think a fun tradition will be to take a new family picture every year and hang them on the tree. 


The Dining Room

Eh, it needs work. I ran out of decorations by this point. I want to do something different with this room next year. But for now I hung some old stockings I had when I was a kid, a snowman that once held cookies, and our red globes. 


The Bathrooms

Yep, even the bathrooms get a little festive touch! With seasonal soap and lotions, special towels, and candles. 


I hope you've enjoyed a peak into our home!

December 10, 2013

Christmas Pajama Party

I'm so excited to be a part of the Christmas Pajama Party link up! I meant to join in on the fun for Halloween, but somehow that didn't happen. I'm making up for it this time around and showing off Miss A's several sets of Christmas pajamas!


Obviously, I LOVE Christmas pajamas. Not just for the mini, but for me too! I want to buy them ALL. I have a serious problem restraining myself, but I managed to buy Miss A only two pairs this year, and she got another pair from Grandma! Last year was Miss A's first Christmas and she wore these on Christmas Day.


Oh where has the time gone?! She was five months old, not even able to sit up on her own yet. She was more interested in chewing on her presents and eating the wrapping paper. My little bean. How you've grown so much!


This is her "seriously, mom, why are you taking pictures of me this early" face. These are my favorite pj's. How can you not love the reindeer shirt and reindeer pants? I think she will wear these on Christmas Day. They are from Target!


And here we have her fleece teddy bear candy cane pajamas. Grandma bought her these when she came to visit for Thanksgiving. They're from Crazy 8 (couldn't find them online!).


Take at guess why she's smiling. Why it's Mickey, of course. She watches Mickey Mouse Clubhouse in the morning. :)

Last, but not least, I love her green white polka dot pajamas. They are also from Target and came as a set with her reindeer pajamas.


And, if you're curious, these are the pajamas I'll be wearing on Christmas Day! Hope you have fun following the link up!
 
BLOGGER TEMPLATE BY DESIGNER BLOGS